How to Create Your Own Firefox Add-on with React
Either you want to explore new ways to bring traffic to your web application or just learn a new skill you came to the right place.
But what exactly is an extension or an add-on? Mozilla says it best.
Extensions are like apps for Firefox. They add features to Firefox to make browsing faster, safer, or just plain fun.
We’ll take a look at how to create a simple Firefox extension using React and go through the submission process together. Hint: it's simpler than you think.
- Creating a simple React application
- What makes it an extension?
- Testing it out
- Submitting it to Add-on Developer Hub
You can find the source code for this project on my GitHub.

Creating a simple React application
We’ll create a simple generator that enables users to create universally unique identifiers or UUIDs. UUID is a 128-bit piece of data displayed in a form of 32 hexadecimal digits, e.g., 3adee25a-eb20–48ca-9106–84820e108b20.
There are a few different versions of UUIDs. It all depends on how they are generated but for simplicity's sake, we’re only going to implement the one that generates UUIDs using random numbers — version 4.

The best way to create a new React application is by running npx create-react-app which sets up the development environment for us. The only prerequisite you need is to have Node >= 10.16 and npm >= 5.6 installed on your machine. We’ll use React in combination with Typescript and npm therefore, we need to add the --template typescript and --use-npm flags.
npx create-react-app uuid-extension --template typescript --use-npmWe’re going to install two libraries which will help us speed up the development process. The first one being Material UI and the second one uuid which also requires its types to be installed as a development dependency.
npm install @material-ui/core uuid
npm install --save-dev @types/uuid
I’m assuming you already know the basics of React so I won’t bore you with the details on how the code we’re going to write works. That said, let’s get started.
First, let’s clean the project a little bit. We can safely delete the contents of the App.tsx‘s return function and remove logo.svg,App.test.tsx, and App.css from the src folder. Let’s also remove favicon.ico, logo192.png, logo512.png, and robots.txt from the public folder since we won’t be needing any of them. The cleaned App.tsx should look like this.
//App.tsx
function App() {
  return (
    <></>
  );
}
export default App;
In the next step, we’re going to add the extension’s functionalities. It’s not really preferable to stick everything into App.tsx but since this is a really simple extension we can afford to do that.
That’s all the code we need to get this extension up and running. So let’s break it down and see what we actually did. I’ll be referencing the above code a lot so to make things easier I’ll put the line numbers inside square brackets like so [4–9], meaning from lines 4 to 9.
- [1–5] adding all of the necessary imports.
- [8] getting the preferred color scheme from the user which we’ll use to change the extension’s theme.
- [12–30] creating a Material UI theme object which will according to the user’s settings generate either a light or dark color palette. Additionally, we’re overriding some typography settings.
- [32–34] the function responsible for generating new UUIDs and updating the state.
- [37,58] if we want to use the out-of-the-box theming functionalities Material UI provides us with we have to wrap everything inside
ThemeProvider. - [38]
CssBaselineresets the CSS to a consistent baseline so you can expect the elements to look the same across all browsers. - [39–57] creating a simple layout using the grid, center its items, and space them evenly across the y-axis.
- [46] I’ve found
user-select: allCSS style to be a simple way to replace the copy-to-clipboard functionality. It basically selects the whole text, in our case the generated UUID, when a user clicks on it.
What makes it an extension?
We’ll have to do three things to turn our React application into a Firefox extension. First, we have to create a logo for our extension. Once we’re happy with the design we have to export a 48px, 96px, and 128px version of it. We place the first two inside the public folder. Let’s name them something generic like logo48.png and logo96.png. The 128px version will be used in the submission process.

Secondly, we have to update the contents of manifest.json which is located in the public folder. There are multiple types of manifests and the one we’re updating tells the browser about the web application and how to behave when installed on a user’s device. Since we are developing an extension we have to change its contents.
{
  "name": "UUID Generator",
  "description": "Generate universally unique identifiers fast.",
  "version": "1.0.0",
  "manifest_version": 2,
  "homepage_url": "https://github.com/zanozbot/uuid-generator",
  "browser_action": {
    "default_popup": "index.html",
    "default_title": "UUID Generator",
    "default_icon": {
      "48": "logo48.png",
      "96": "logo96.png"
    }
  },
  "icons": {
    "48": "logo48.png",
    "96": "logo96.png"
  }
}
Using the modified manifest we tell Firefox some basic information about the extension and we can also specify our extension’s functionalities such as background scripts, content scripts, and browser actions. As you can tell from the above manifest.json we’re using the browser action which adds a button to Firefox’s toolbar and opens a popup when clicked.
The final thing we have to do is to create a .env file at the root of the project and paste the following line INLINE_RUNTIME_CHUNK=false inside. When running npm run build the React compiler will pick this up and won't insert the runtime script into index.html but rather import it as usual. This is in my opinion the easiest way to add development environment variables to React projects. Read more about adding development environment variables in .env.
We’re now ready to build the extension for production.
npm run buildTesting it out
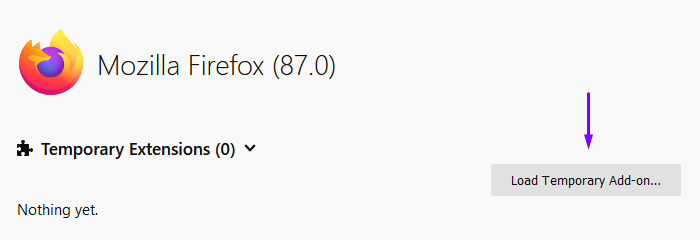
To test our extension we have to open the Firefox Debugging tool. We do that by typing about:debugging in the Firefox URL bar. Next, we click on the This Firefox tab which provides information about the extensions and running workers. Our focus will be on the top of the page, more specifically on the Temporary Extensions panel.
Click on Load Temporary Add-on… which should open a file picker. Navigate to the build folder of the extension, select the index.html and press Open.
This enables us to preview the extension and if we’re satisfied with how it looks and functions we can proceed to the final step which is submitting it to the Add-on Developer Hub.
Submitting it to Add-on Developer Hub
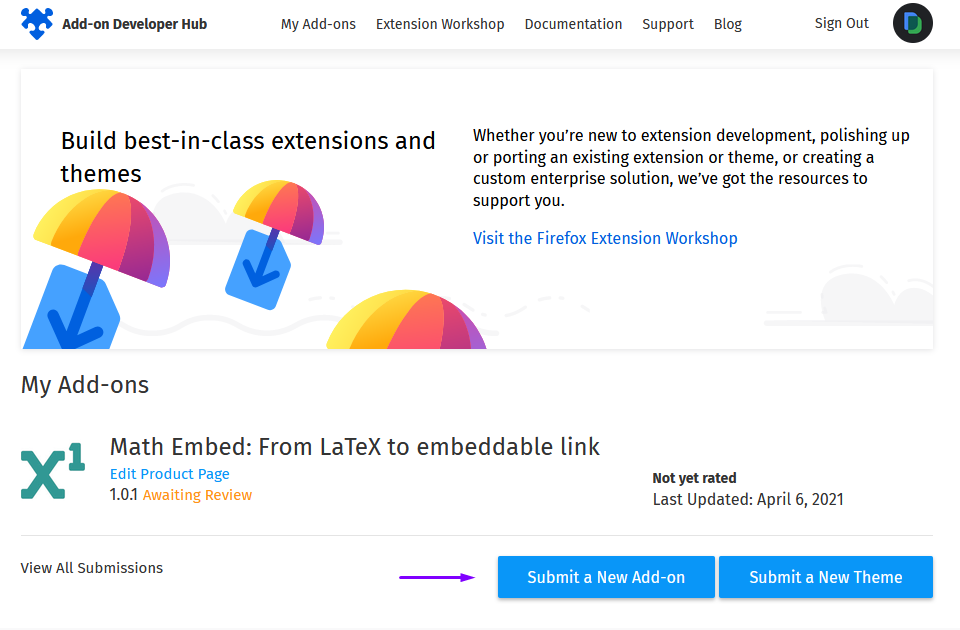
Navigate to Add-on Developer Hub and click on Submit or manage extensions. If you are already logged in the provided link should take you to your console where you can simply click on Submit a new Add-on.
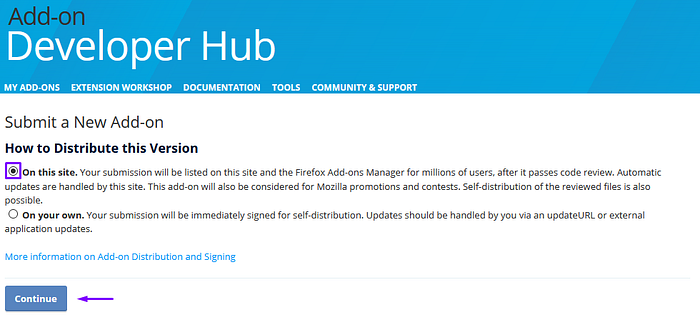
After that, we’re asked to decide how we’re going to distribute the extension either on our own or on the Firefox Add-ons Manager. We’ll choose the latter.
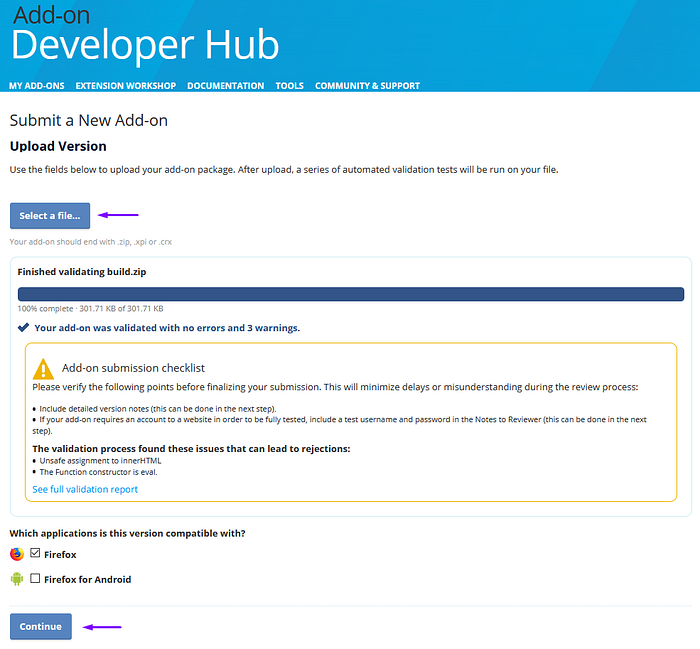
Next, we’re finally asked to upload the extension. But before we can do that we have to compress all of the contents of the build folder into a ZIP file. After that, we can click on Select a file… and open the freshly compressed file.
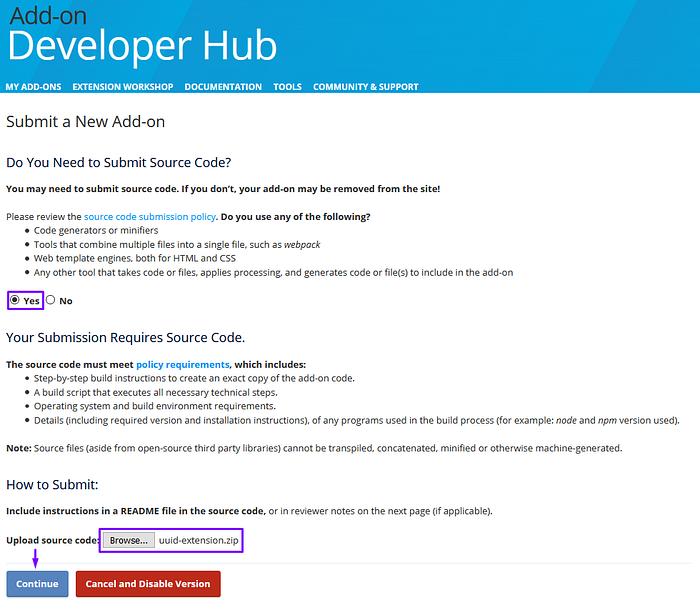
In the next step, we’re asked to review the source code submission policy and attach the source code if needed. Since we’ve developed an extension in React and React does minify and generate some additional code we also have to compress and upload the source code.
Don’t forget to include instructions on how to build your extension in the README.md file to avoid unnecessary rejections.
Lastly, we have to describe the extension we’ve just uploaded. Some information will already be prefilled from manifest.json we created earlier. After filling in all of the required fields, we’re finally ready to submit the extension by clicking on the Submit version.
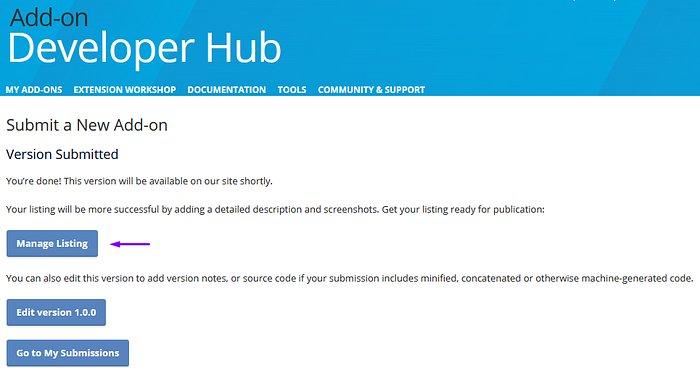
That’s it. The extension should be available on Firefox Add-ons Manager in no time. Since we want to increase the chances of it being discovered we’ll also provide some additional information that wasn’t available in the previous steps such as images and tags. We can do that by clicking on Manage Listing.
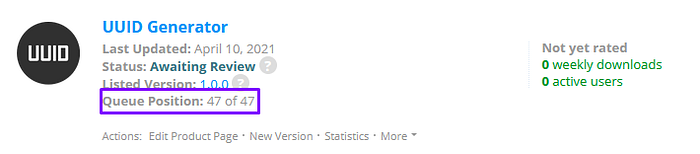
After we’re happy with the results we can navigate to the submissions page and start refreshing it. The best part of the whole submission experience is that Add-on Developer Hub actually shows you when your extension is going to be reviewed.
If you’d like to create an extension for Google Chrome check out Dik’s article on Creating your own Chrome Extensions with React is easier than you think.

